Pain Worse with Bending Forward
The 5-Step Exercise Progression
These exercises progress from gentle to more challenging. At each step, if you feel your pain centralizing (moving toward the center of your back), that is a positive sign.
[!note] Some discomfort in the center of your lower back is acceptable during these exercises. However, if pain spreads toward your legs at any point, stop that exercise immediately.
Step 1: Prone Lying (Passive Extension)
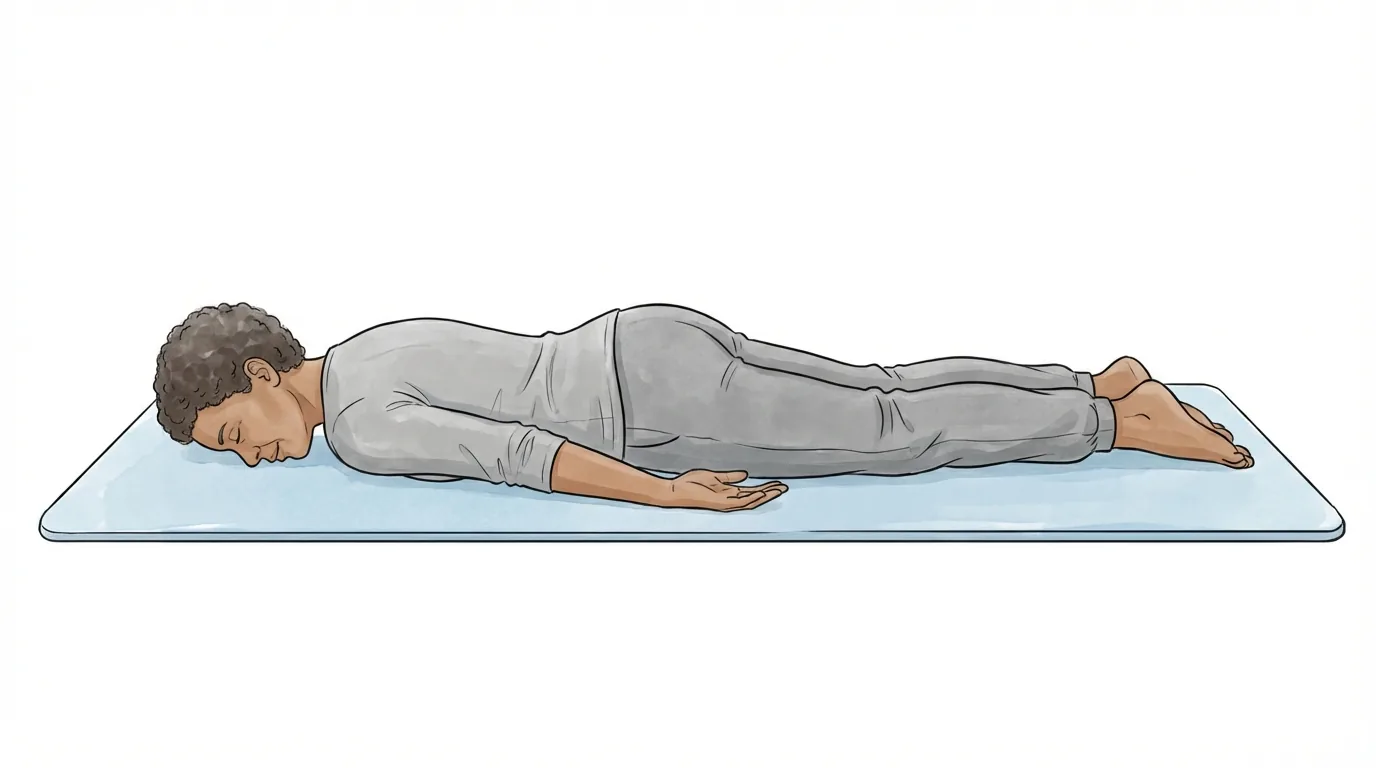
Goal: Gently introduce your body to an extended position
- Lie face down on a firm surface (bed, exercise mat, or floor)
- Turn your head to one side and let your arms rest comfortably at your sides
- You may place a thin pillow under your stomach if needed
- Relax in this position for 5–10 minutes
- Breathe naturally and let your muscles release tension
Key point: You don't need to "do" anything at this stage. Simply allow your lower back to settle into a gentle arch while lying face down.
Step 2: Prone on Elbows (The Sphinx Position)
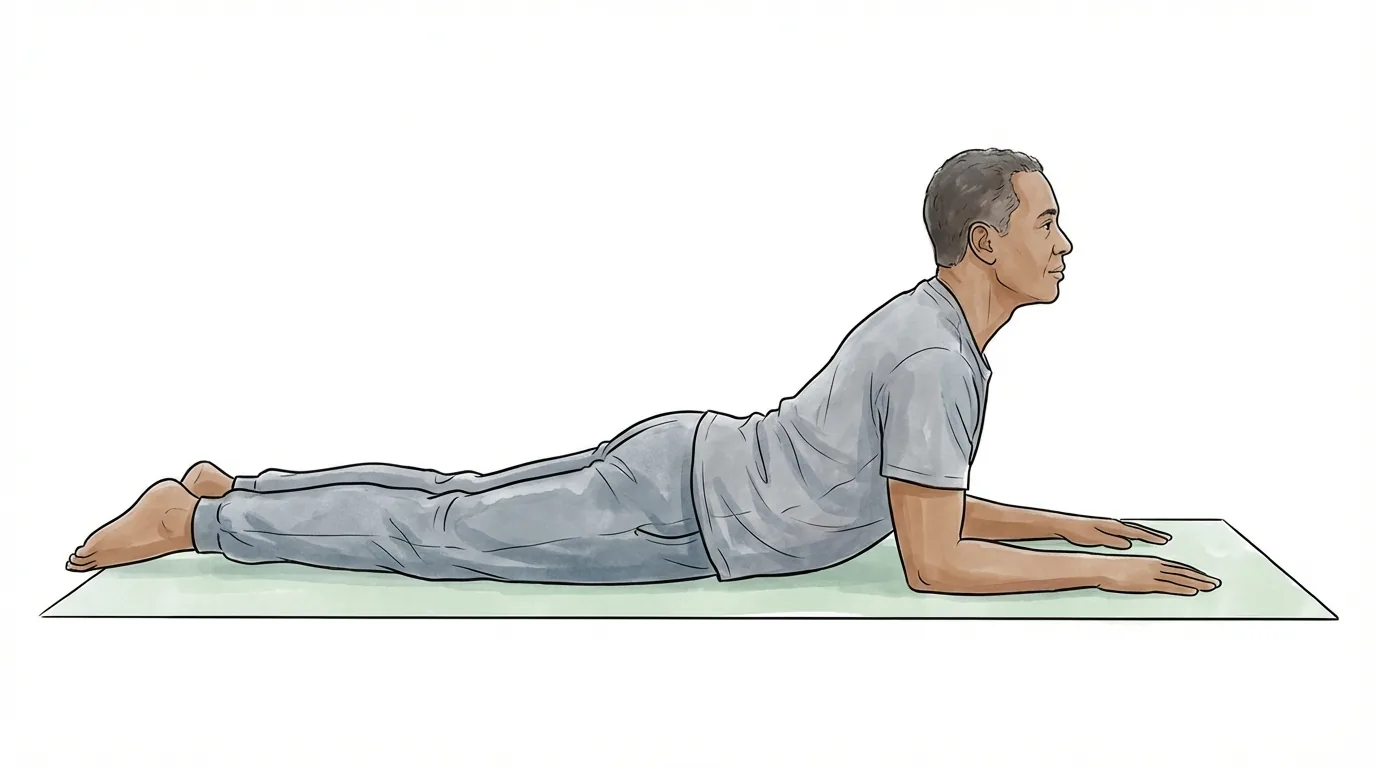
Goal: Gradually increase the extension in your lower back
- From the prone position, place both elbows directly under your shoulders
- Support your upper body on your forearms
- Keep your lower back muscles relaxed — don't tighten them
- Hold this position for 3–5 minutes
- If it feels uncomfortable, return to the flat prone position and try again later
Key point: Think of the Egyptian Sphinx — your pelvis and stomach stay on the floor while your upper body rises on your elbows.
Step 3: Press-Up Extension
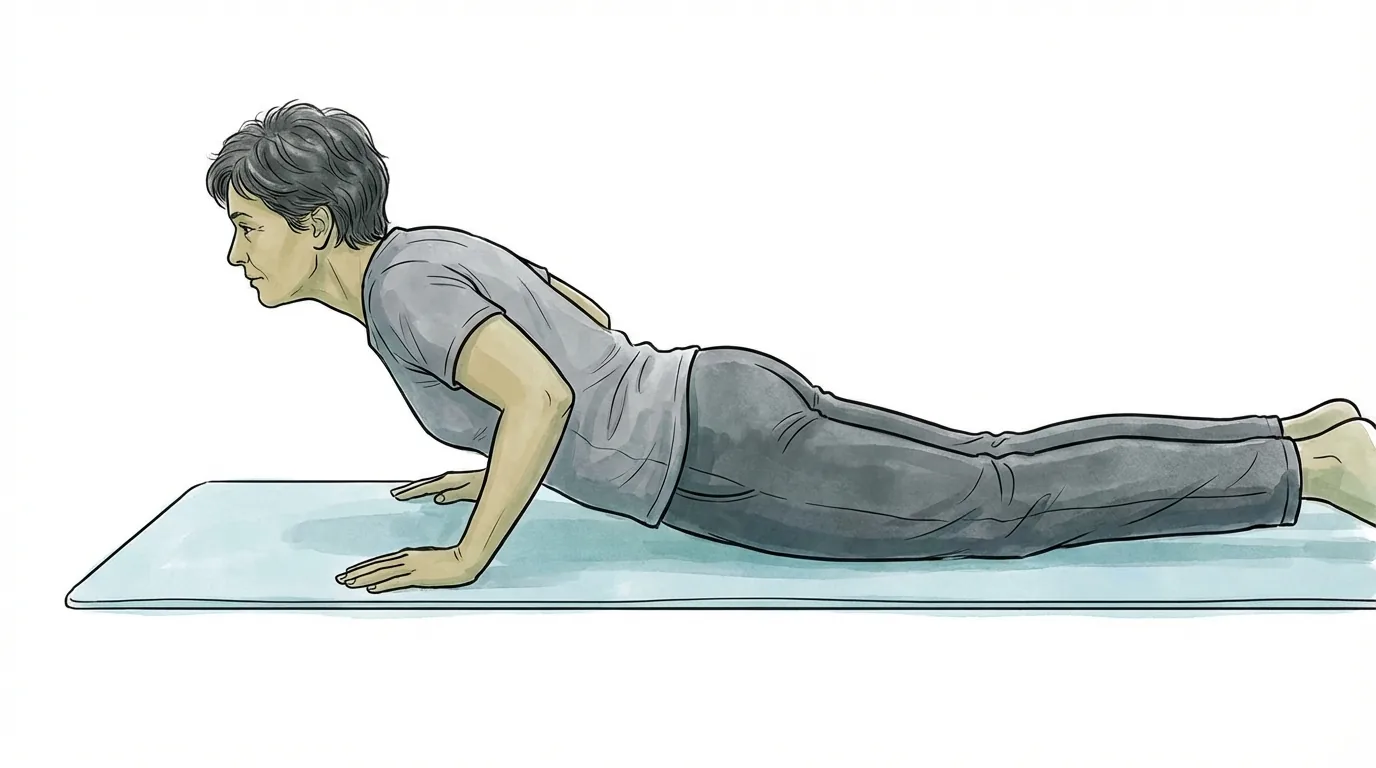
Goal: Achieve a fuller range of extension in your lower back
- From the prone position, place both hands beside your shoulders
- Keeping your lower back completely relaxed, push your upper body up with your arms
- Keep your pelvis on the floor — do not lift your hips
- Hold the top position for 2 seconds
- Slowly lower yourself back down
- Repeat 10 times
Key point: This is not a push-up. Your arms do all the work while your lower back "sags" passively. The most important thing is to keep your back muscles relaxed — do not tighten them to lift yourself.
Recommended frequency: 10 repetitions per set, 6–8 sets per day
Step 4: Standing Extension
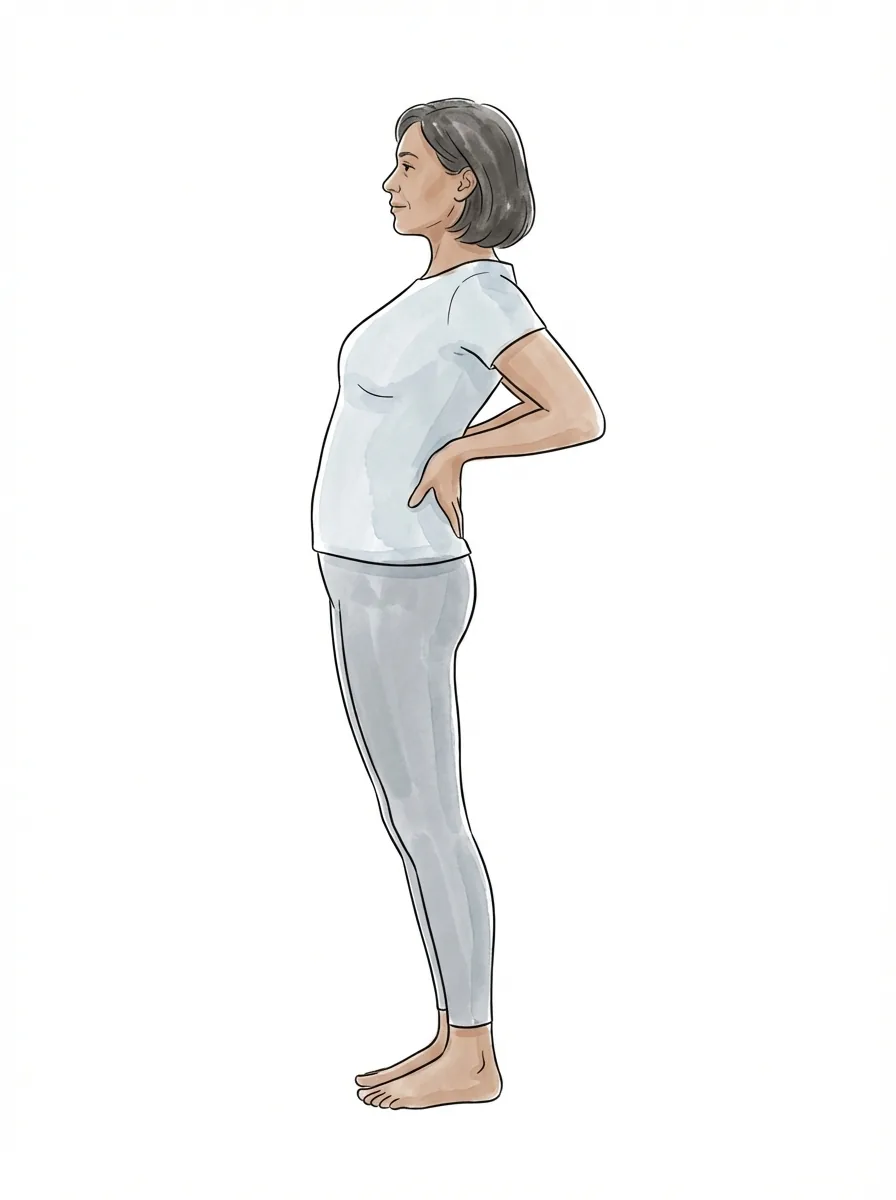
Goal: A convenient exercise you can do anywhere throughout the day
- Stand with your feet shoulder-width apart
- Place both hands on the small of your back (just above your belt line)
- Use your hands to push your hips forward while slowly arching backward
- Hold the arched position for 2 seconds
- Return slowly to the upright position
- Repeat 10 times
Key point: This exercise can be done at work, while traveling, or anywhere you have a moment. Do it every time you've been sitting for more than 30 minutes. Keep your knees straight.
Particularly helpful after:
- Prolonged sitting
- Bending or stooping activities
- Waking up in the morning (start with Step 3 press-ups, then move to standing extension)
Step 5: Sustained Press-Up (Advanced)
Note: Only progress to this step once you can perform Steps 1–4 comfortably without any increase in leg symptoms.
- Perform a press-up (Step 3) and hold the top position with arms fully extended
- Take a deep breath out
- As you exhale fully, you may feel your lower back settle a few millimeters deeper into extension
- Alternatively, a partner can apply gentle pressure between your shoulder blades to assist the movement
Key point: Do not force a deeper range. Always confirm that pain does not spread toward your legs.